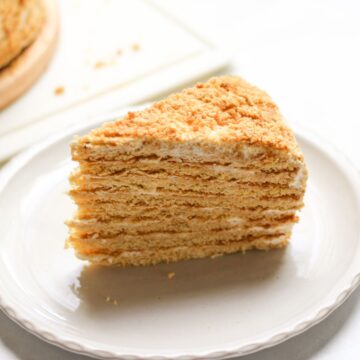
Honey Cake, or Medovik is the iconic Eastern European dessert. This stunning 8-layer cake features thin, honey biscuit like layers softened by a tangy, velvety sour cream filling and finished with signature crumb coating.
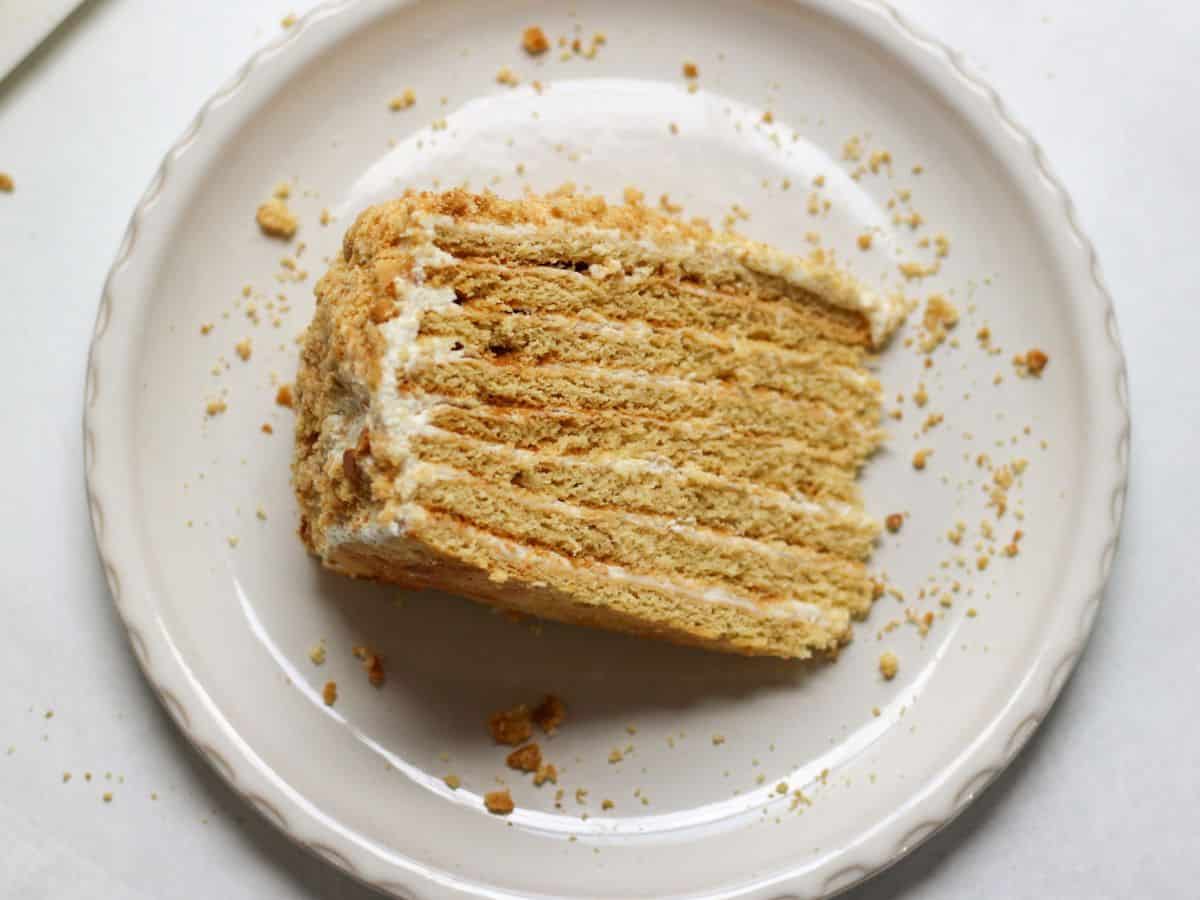
If you have never tried this cake, it is a labor of love that is absolutely worth the effort. Medovik cake has soft thin layers with a nice honey flavor and a tangy filling. It is a wonderful cake to make for special occasions.
You may see a couple of slight variations of this cake, as every family has their own. This is our family recipe that comes from Ukraine, where we would make this cake for every holiday. I learnt to make it long time ago, and it is my favorite honey cake ever. The only thing I changed is the filling. My family recipe used to make hers with only sour cream filling, but I make mine with part sour cream and part whipped cream. My American friends absolutely love this cake and call it a special cake.
While baking eight individual layers might seem like a lot of work, my step-by-step instructions break the process down into 3 easy stages. If you are feeling too overwhelmed by the process, I recommend baking the layers 2-3 days prior.
You may also like my simplified medovik version made into a sponge cake honey cake.
Below, I have included detailed step-by-step instructions with visuals, along with my best techniques for the perfect Medovik cake, even for first-timer bakers.
Plan the baking process
But before you start making the bake, please choose the schedule that works best for you. Because this cake requires rest and soak period, I recommend starting 1-2 days before you plan to serve it.
The 48-hour schedule (my recommendation): Bake the layers on day one, then assemble on day two. This is a great way to break down the work while still allowing the assemble cake a full 24 hour rest in the fridge.
The 24-hoour schedule: Bake and assemble on day in one full day before letting it rest in the fridge for 24 hours.
Note:You will need about 2 hours to make the layers, about 1 hour to cool them down and about 40 minutes to assemble the cake.
The science of perfect medovik
The secrets to a perfect medovik is to let it rest in the fridge, I call it hydration period.
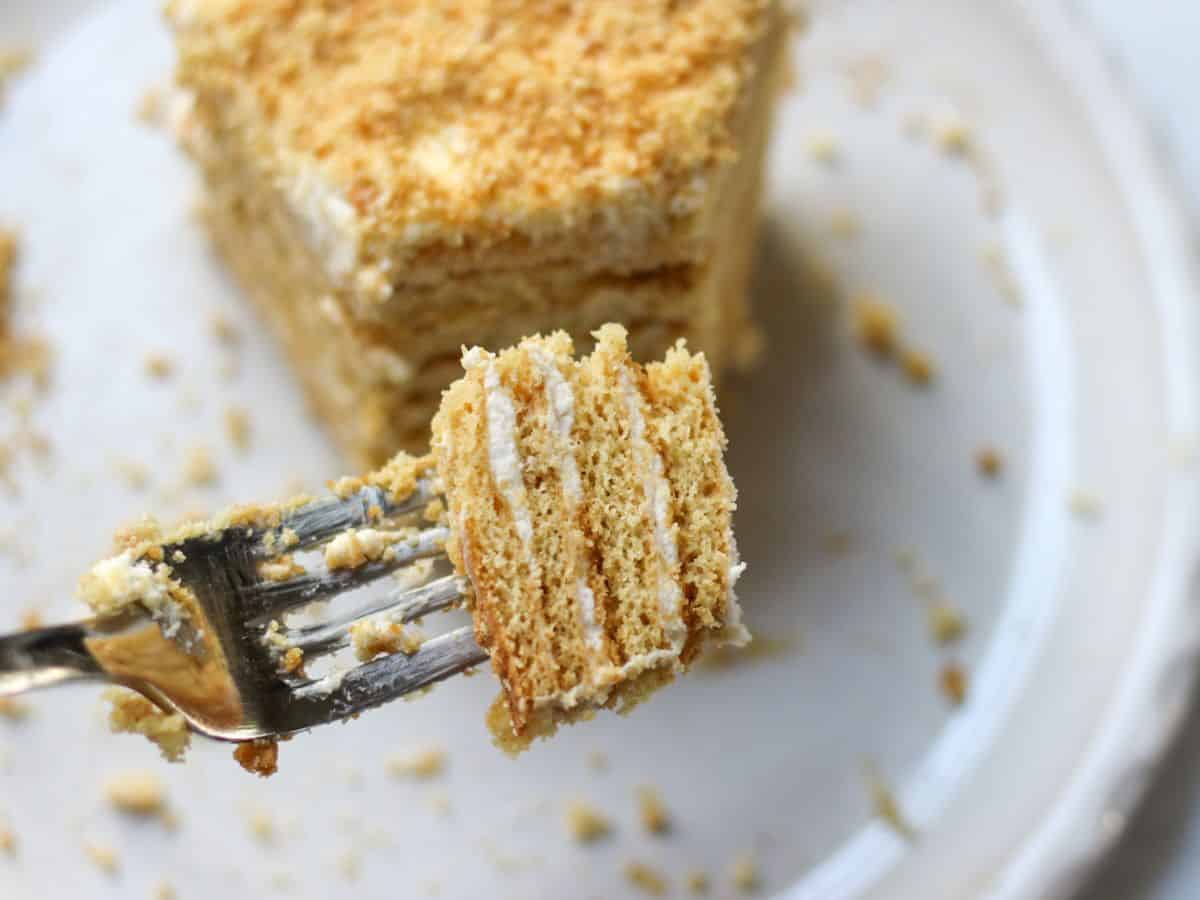
Why wait 24 hours? Honey cake layers are basically honey biscuits when first baked. During the rest in the fridge, the layers absorb the moisture out of the frosting and transform the cake into soft, velvety texture. Waiting also gives the frosting time to firm up. If you cut it too soon, the layers are still hard to sink a fork into, and the soft frosting will just squish out the sides. You do not want them.
Bottom line, the patience is very important and consider the waiting period as part of the cooking process as it transforms the cake layers into soft and tender cake.
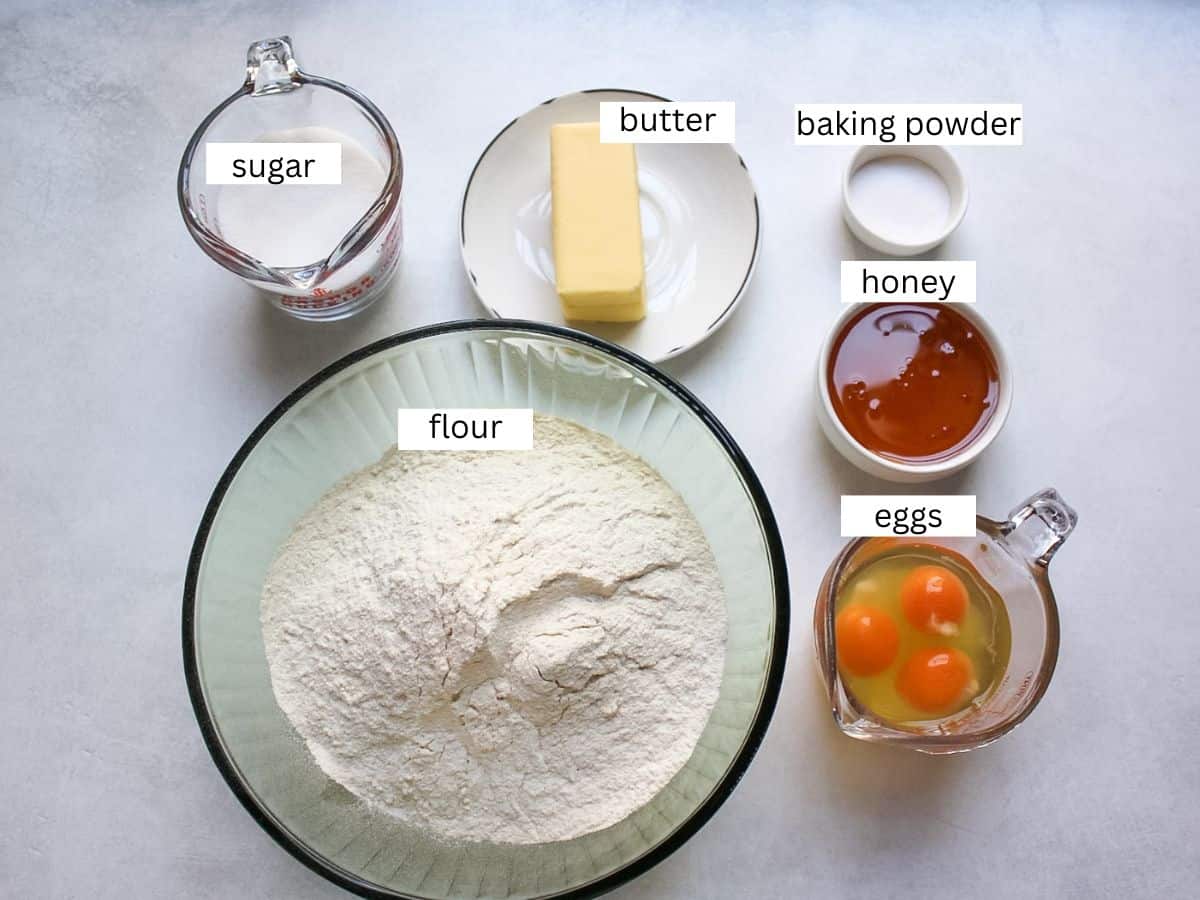
Medovik honey cake ingredients
This is the ingredients overview. You can find the quantities in the recipe card at the end of this pots.
Honey cake layers
- Flour: You will need all-purpose flour. Do not use cake flour or bread flour.
- Unsalted butter: Any butter works, but I prefer high-fat European style butter.
- Sugar: Granulated or bakers fine sugar works.
- Honey: Use quality honey. I used local wild flower honey.
- Eggs: Eggs can be cold or room temperature. I does not matter.
- Baking soda: it will react with honey and create a little lift and lighter texture for the layers.
Sour cream frosting
- Heavy cream: You will need a cold heavy cream.
- Sour cream: Make sure to use full fat sour cream. The more fat content the better.
- Powdered sugar: For sweetness and it also acts as structural stabilizer for the frosting.
- Vanilla extract: For flavor
Step-by-step instructions
Please read all the instructions carefully before you start making the cake.
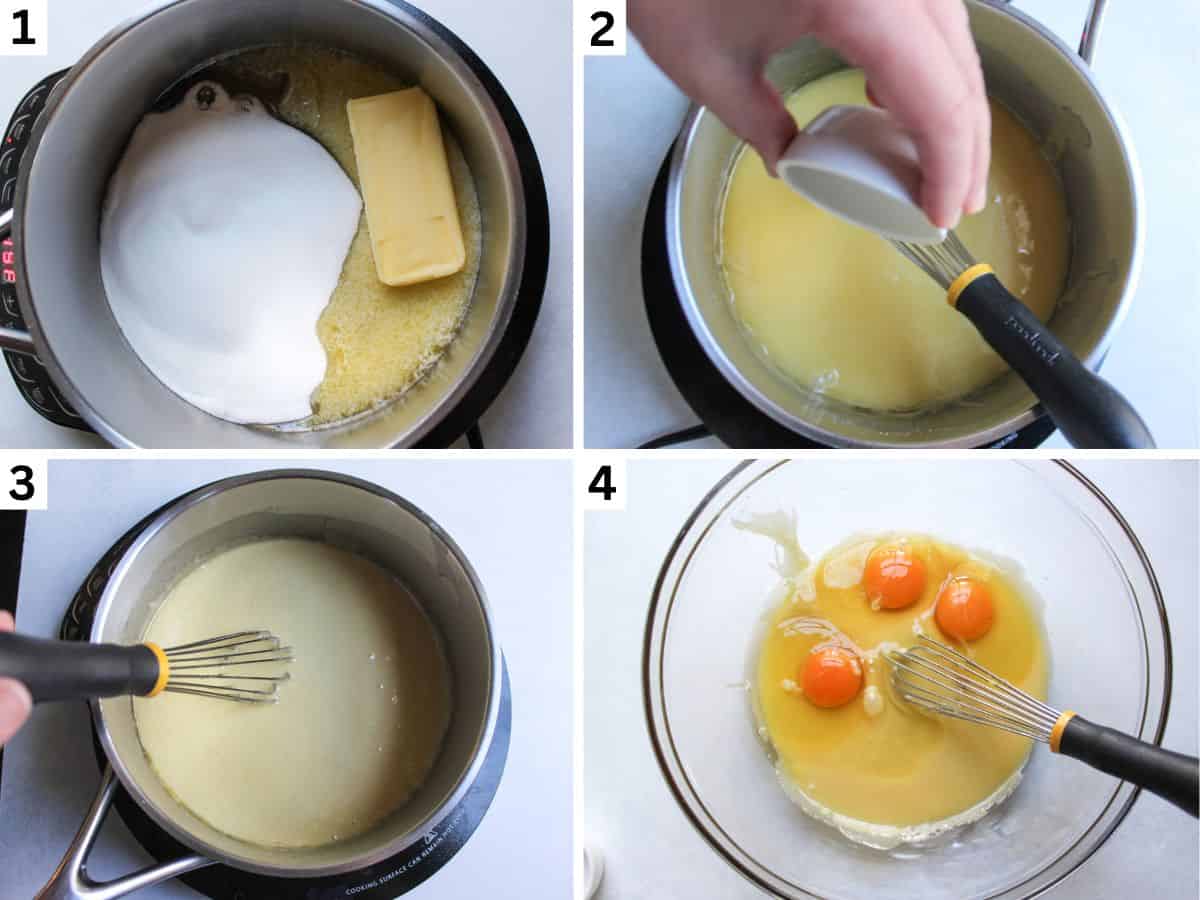
In a large saucepan, add sugar, honey and butter. Place it over low heat, string it often until the ingredients melt and become very warm. But not boiling! (image 1).
Take it off the heat and and baking soda (image 2)., stirring it until the mixture foams slightly as the acidic honey reacts with baking soda (image 3).
Transfer the honey mixture in to a large bowl. If it is still too hot, let it cool slightly. After that, add 3 eggs. Mix everything with a whisk until well combines (image 4).
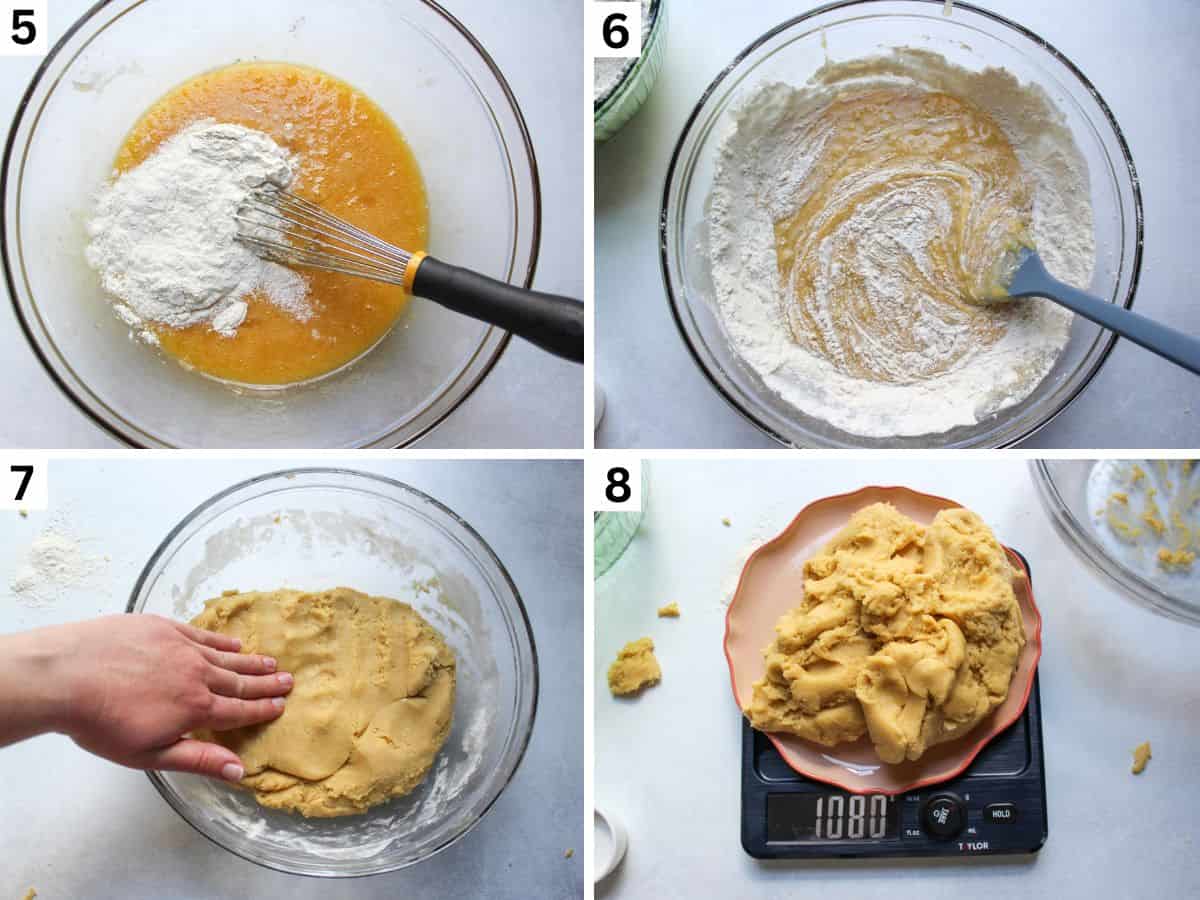
Gradually add flour, mixing the dough with a whisk first (image 5). When it too hard to use a whisk, use spatula and at the end, use hands to knead it gently. Do not add all the flour, because you may need less or more (image 6). Once you can mix the dough with hands and it does not stick to your fingers (slightly sticky is OK), the dough is ready and does not need more flour. It should resemble a cookie dough (image 7). I like to weight the dough, so I know how to divide it in to 8 same size pieces (image 8).
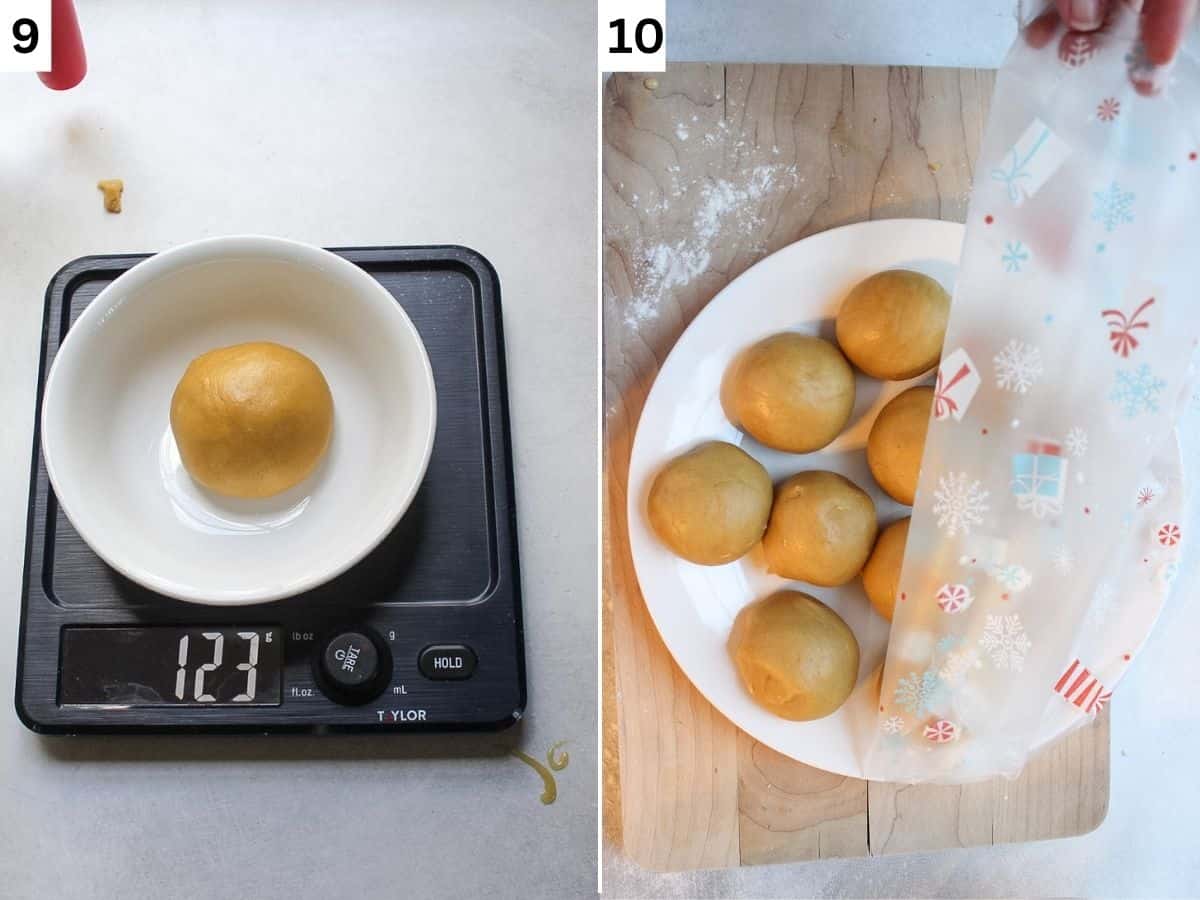
Divide the dough into 8 parts and form the balls. I made mine 124 grams each. I do not recommend them smaller, as you will need some scraps for crumbs (image 9). Place them on a plate and cover with plastic wrap so they do not dry out (image 10).
Place a parchment paper on a flat surface. We will be rolling the layers straight on a parchment paper. You can also do it on a well-floured surface, but it is so much easier to roll it on a parchment paper right away.

Place the dough ball on a parchment paper and flatten it slightly with your hands (image 11). Roll in into a thin circle (⅛ inch or thinner) with a rolling pin. Circle does not have to be perfect but wide enough to cut one out after baking. The circle must be large than your desired cake size. So I use a 9-inch plate to cut out, I roll the dough to 10 inches or larger (image 12).
If the layer tears up, use your fingers to gently patch it together. Pierce the surface of the rolled layer gently with a fork before baking (image 13).
Transfer the parchment paper with a cake layer on a baking sheet. Bake at 350F for bout 4-6 minutes or until golden brown (image 14). When you get a hang of it, while one layer bakes, you can roll the second layer. You can reuse the same 2 parchment paper sheet, alternating them for the faster process.
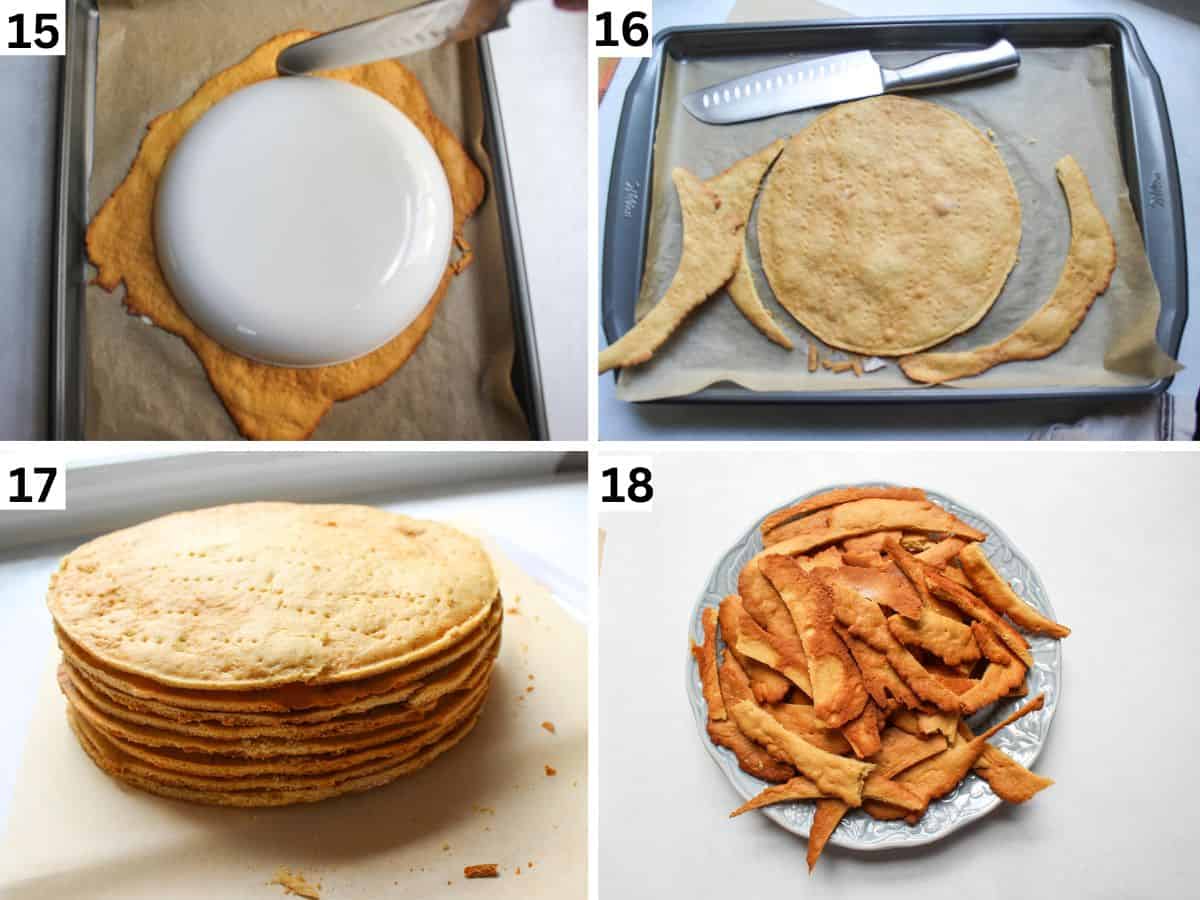
Immediately after taking the pan out of the oven, while the layer is still hot and soft place your lid or a plate on top. Use a sharp knife to trim the edges into a perfect circle (images 15, 16). If you try to cut it after it cools down, the layer will crumbs ans it hardens once cools down. So make sure to cut it right away after baking.
Stack the baked layers on a plate (images 17) and keep the baked scrapes separately (images 18).
Why I do not cut out the circle before baking? Cutting out the edges after baking exposes the interior on the sides, allowing the frosting to stick batter on sides penetrate from the edges as well as the top. It also results in a cleaner, sharper cake sides.
Texture note: When the layers cool down, they will harden and become cracker like. Do not worry, it means you made them right. They will soften during the resting period.
Make frosting
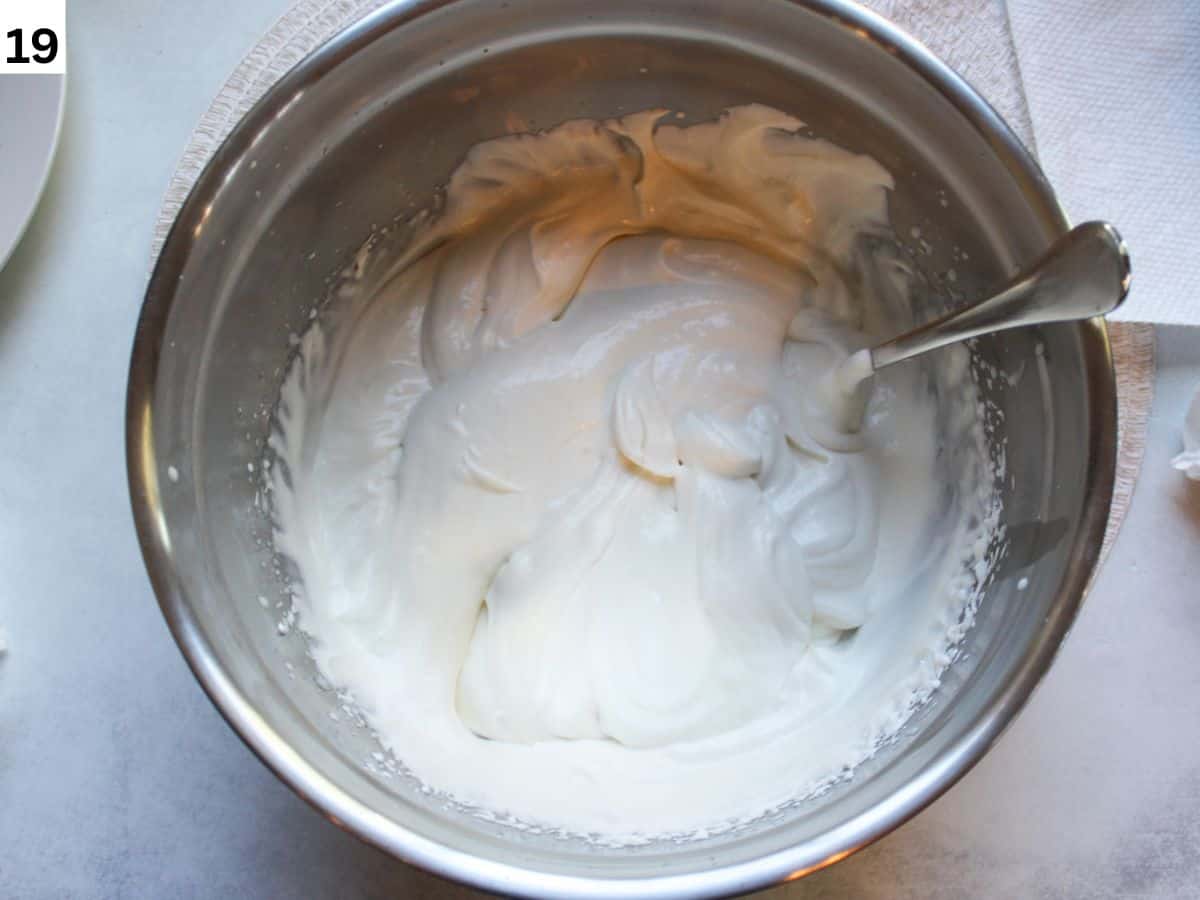
In a cold large mixing bowl, add heavy cream. Using electrical mixer, mix on high for one minutes until bubbly. Add powdered sugar and vanilla. Mix on high until stiff peaks form.
Add sour cream and mix on medium speed just until combined. Use right away for assembling the honey cake (image 19).
Prepare the cake crumbs
A classic Medovik is always finished with a signature layer of golden crumbs. To make these, we saved and baked those dough scraps left over from cutting your cake circles.
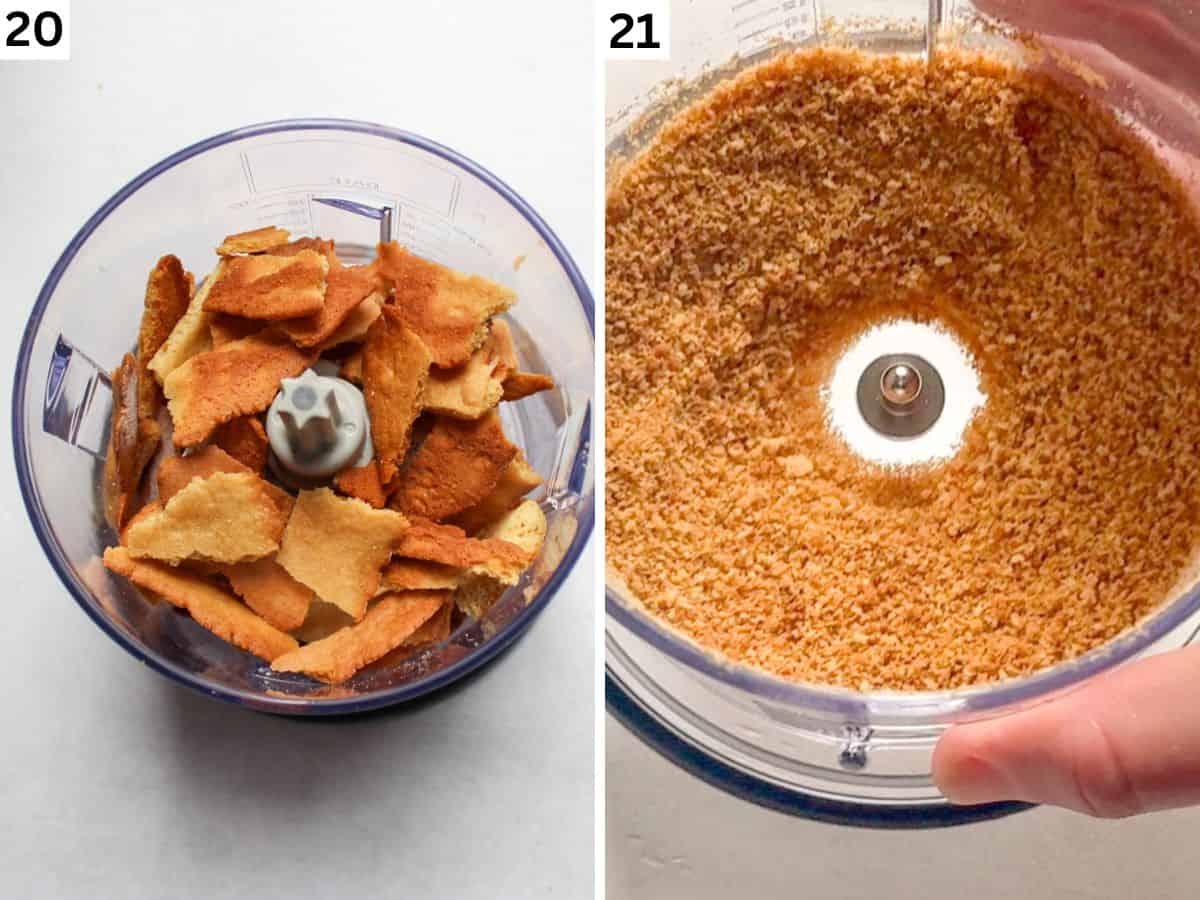
Once baked edges have cooled completely, pulse them in a blender or a food processor until they reach medium or fine consistency (images 20,21). If you are not ready to assemble the cake, you can store the crumbs in an air tight container or a sealed bag .
If you choose fine crumbs, it will give the cake velvety, suede-like look. If you use medium crumbs (created by a few short pulses), your cake will have more rustic look with a slight crunch.
If you want extra deep flavor and color, toast the crumbs at 320F for about 2-5 minutes after blending.
Assemble the honey cake
Place a small dollop of frosting in the center of your cake stand or serving dish. This acts as and anchor to prevent the cake from sliding during the assembly.
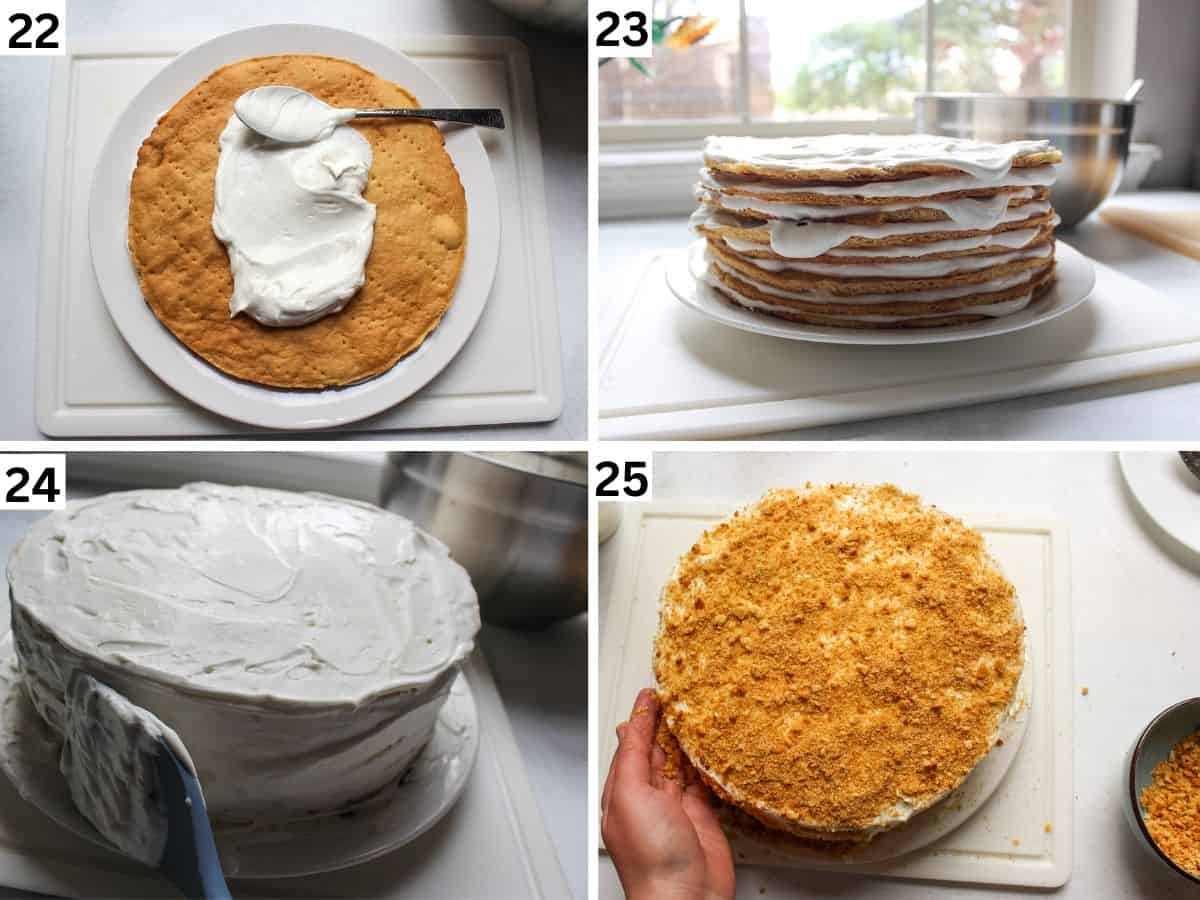
Place the first cake layer down. Spread a generous, even layer of frosting over the surface (image 22).
Gently place the second layer on top. Do not press down. You want thick, uniform layer of frosting between the layers, so it makes the layers soft. Repeat until all layers are stacked (image 23).
Evenly coat the top and sides with the rest of the frosting (image 24). Sprinkle the reserved honey crumbs over the top and press them into the sides (image 25). See technique bellow.
Refrigerate the cake for a minimum of 12 hours, though 24 hours is ideal. The frosting will fully hydrate the layers, creating a perfect butter-soft layers.
How to easily apply crumbs to the sides?
Tuck 4-5 pieces of parchment paper under the edges cake. Once you done with crumbs, carefully pull the parchment away, leaving the cake stand perfectly clean.
Hold a handful of crumbs in your palm. Bring your hand with crumbs toward the bottom of the cake. Gently press the crumbs against the side, moving your hands upward in a sweeping motion. Let access fall back into your hand on on onto parchment paper. Sprinkle a good layer of crumbs on the top of the cake as well.
You can also use a bench scraper to apply the crumbs to the sides of the cake.
Medovik expert tips
- I recommend using the kitchen scale for measuring the flour and also making sure the layers are divided evenly.
- Use baked edges from layers for the crumb topping. And if somehow you do not have enough, you can also use graham cracker crumbs.
- If you make cake into a square shape and need to cut layers after baking, make sure you cut them right after baking while they are soft. Once they cool down, they become crumbly, cracker-like texture.
- Assemble honey cake at leas 12 ( if you have no patience ha-ha) , but better 24 hours ahead of time. The the layers need to absorb the moisture from the frosting, so the become melt-in-your mouth texture.
- When you add the frosting, make sure to spread a thick layer of eat between each layer. When you place the next layer on top, press it very gently so the frosting does not come out on sides. Once the cake stays in the fridge for 12-24 hours, the layers will absorb extra frosting and it will also stabilize.
Make ahead tips
- The dough: you can keep the dough in the fridge for up to 2 days. Make sure it is tightly wrapped in plastic wrap to avoid the air contact. Before baking, bring it to a room temperature and the dough will soften and it will be easy to work with.
- Baked layers: You can keep baked layers (no frosting) for up to 3 days at room temperature or for up to 5 days in the fridge. Make sure they are in a sealed bag or wrapped in plastic wrap. You can also freeze them for up to 2 months. Thaw them overnight before assembling the cake.
- Prepared cake: The prepared cake can be store in the fridge for up to 5 days, that includes the 24 hour rest and soak time. I do not recommend freezing the cake, as the frosting will separate.
More baking recipes with honey to try
If you have never baked with honey, I recommend my guide on how to bake with honey with all the tips and tricks I have learned and discovered.
Thank you so much for baking with me!
📖 Recipe
Honey Cake Medovik
Equipment
- 1 medium pan
- 1 Whisk
- 1 large bowl
- 1 silicone spatula
- 1 Baking pan
- parchment paper
- blender or a food processor
- hand held mixer
Ingredients
Honey cake layers ingredients
- 113 grams (1 stick) unsalted butter, cold
- 150 grams (¾ cup) granulated sugar
- 130 grams (½ cups+2 tablespoons) honey
- 1½ teaspoon baking soda
- 3 cold eggs
- 550-600 grams (4.8-5 cups) all-purpose flour, more for dusting
Sour cream frosting
- 1 pint (473 ml) heavy whipping cream
- 200 grams (1 ⅔ cups) powdered sugar, divided
- 2 cups full fat sour cream I use Daisy brand
- ½ teaspoon vanilla extract
Instructions
- Melt and react. In a small saucepan, combine sugar, honey and butter. Place over low heat, stirring frequently with a whisk until the butter melts and sugar dissolves. The mixture should be very warm, but not boiling. Remove from heat and stir in baking soda right away with a whisk. The mixture will foam slightly s the honey's acidity reacts with the soda.
- Add eggs. Transfer the warm mixture to a large bowl. It if is very hot, let it cool slightly so the eggs do not cook. Add 3 eggs and whisk until the mixture is smooth and well combined.
- Add flour. Mix flour and salt. Gradually add the flour, whisking it at first. As the dough thickens, switch to a spatula, and finally use your hands to knead it just until comes together in a ball.
- Divide the dough. Immediately weigh the total dough and divide into 8 equal portions. Shape into balls, place them unto a tray, and cover with plastic wrap to prevent a skin from forming.
- Roll the dough. Preheat the oven to 350℉. Place one dough ball directly onto a lightly floured sheet of parchment paper. Flatten it slightly, then roll into a ⅛ thin circle. The circle should be large than the plate or a lid you will be using to cut it out. My plate is 9 inch, so I aim to roll each layer about 10 inch or larger. If the dough is too sticky, sprinkle flour onto a rolling pin as well. You can also place another sheet on parchment paper on top and roll layers between the parchment paper if they stick too much.
- Bake. Transfer the parchment to a baking sheet. Gently pierce the wholes with a fork all over the surface of the layer. Bake for 5-6 minutes or until the edges are golden brown.
- Cut out the layer. As soon as the layer comes out of the oven. use a large lid or dinner plate to cut out a perfect circle while it is still warm. Keep the scrapes for crumbs separately. Important!:Once the layer cools down, you will not be able to cut it as it hardens.
- Stack. Stack baked and cut layers on a plate and keep the scrapes in a separate bowl. Repeat with the remaining 7 balls, stacking the baked layers on top of each other.
Sour cream frosting
- Whip. In a cold mixing bow, beat the heavy cream on high for about 1 minute until bubbly.
- Add sugar. Add powdered sugar and vanilla. Continue whisking on high until soft peaks form.
- Add sour cream. Add sour cream and mix on medium speed just until combined. Use the frosting immediately. The frosting/filling might be a little bit runny, but it is suppose to be like that as we need moisture to soak the layers. Once the cake rests, it will absorb into layers and the rest will stabilize.
Make the honey crumbs
- Process. Place cooled baked scraps into a blender or food processor. Pulse briefly for a medium crumb (added crunch) or blend longer for a fine crumb (velvety finish). You can also add them to the sealed bag and crush with a rolling pin into crumbs.
Assemble the cake
- Anchor. Spread a small dollop of frosting in the center of your cake stand to prevent the cake from sliding.
- Frost and build layers. Place the first layer down. Spread a generous, even layer of frosting. Aim to add about ½ cup between each layer. Top with a second layer, do not press down hard. Preheat until all 8 layers are stacked.
- Coat the top and sides. Use the remaining frosting to cover the top and sides of the cake in a smooth layer.
- Apply the crumbs. Tuck the strips of parchment paper under the cake edges to keep the stand clean. Sprinkle a layer of crumbs on top of the cake. Grab a handful of crumbs in your palm and gently press them against the sides in an upward sweeping motion. Alternatively, use a bench scraper to press the crumbs into the frosting.
- Refrigerate the cake. Place the cake in the fridge for at least 12 hours, though 24 hours is ideal. The honey layers need to absorb the moisture from the frosting to become soft.
Notes
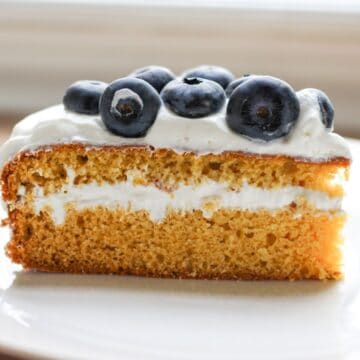
You can add fresh berries on top. You can also add sliced strawberries in the middle of the cake between the layers.


Comments
No Comments